BUYING A PIVOT DOOR
We want to make the experience of selecting your pivot-hung entryway as seamless as possible. To help we have created a step-by-step guide. The following instructions will help you work through the process of buying a pivot door. If at any moment in the process you feel like you need help, please don’t hesitate to contact our sales and design team.
The buying experience consists of 8 major steps:
Before Ordering
| STEP 1 | Door Design | Plan out the door design, wood species, glass, and size according to project specs, working from our selection or the design of your choice. |
| STEP 2 | Door Fit | Determine the jamb, threshold, and swing specifications so the door unit fits into your structure. |
| STEP 3 | Sidelights Options | If your project requires side or transom lights, we will build these into the jamb, creating one seamless unit. |
| STEP 4 | Handle and Closure Options | We will prep the door for the hardware that goes with your project, whether you buy from us or from another supplier. |
Ordering & Beyond
| STEP 5 | Order Placement | Once you have worked through all of the specifications for the door you wish to order, shop online or contact our sales team. |
| STEP 6 | Construction and Lead Time | Once an order is placed, we source custom materials, wait for their delivery, and, then, build the door. It is ready to ship in 6 weeks. |
| STEP 7 | Packaging and Shipping | We double crate each door, and ship with FedEx Freight. Delivery transit time is 3-5 business days. |
| STEP 8 | Finish and Installation | Upon receipt of the door, you will need to finish and install the door. Though the doors are unique, the installation process is standard. |
| STEP 1 | DOOR DESIGN |
| When deciding on a door design you have four principle elements to determine: Style Wood Species Size Glass |
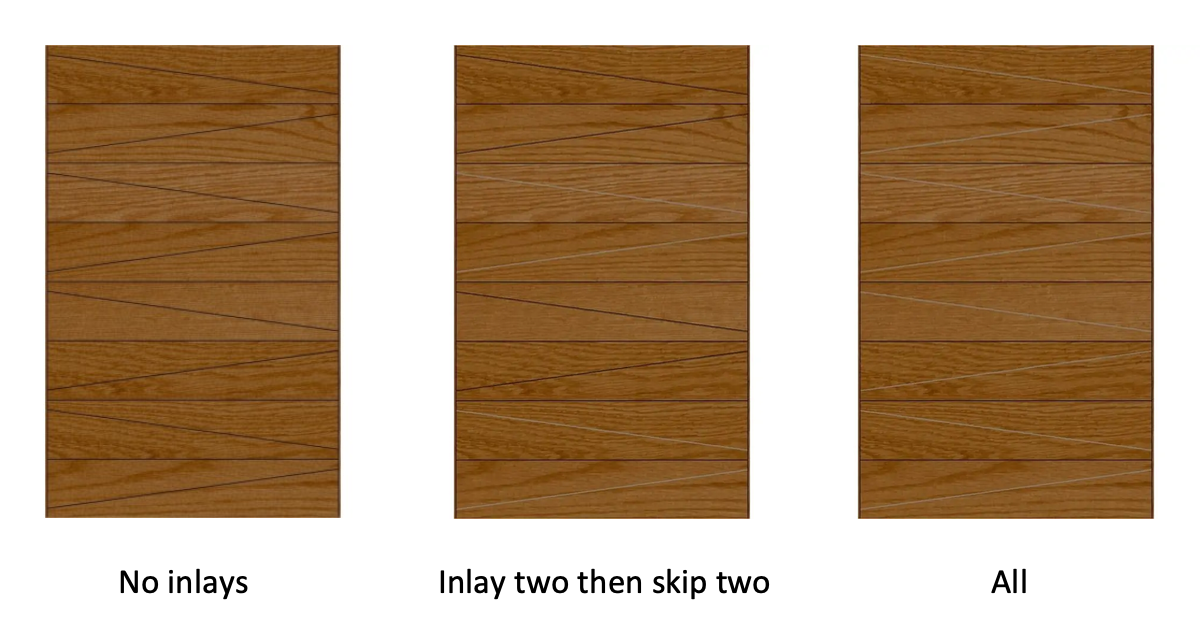
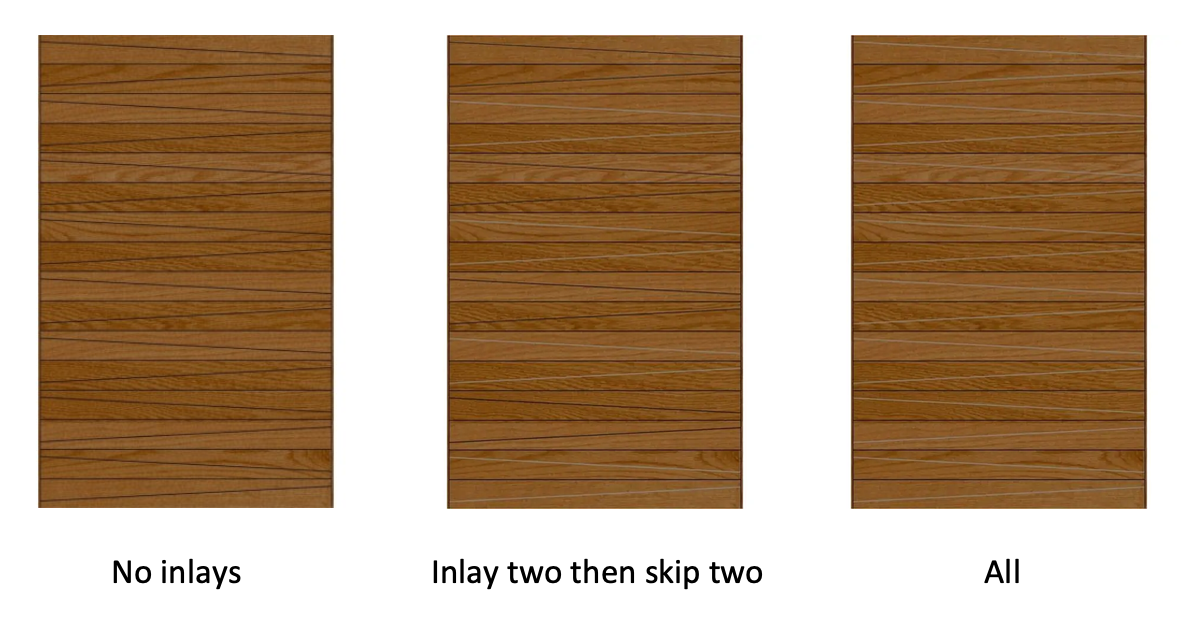
| Choosing a door style… The first consideration when selecting a pivot door is determining what style of door you want. To do this, you have several options. You may choose from one of the styles from our online selection, find an image of a door you like, or present a sketch of the door you would like. We are happy to help you with whatever design you select. Popular Styles from our selection |


Choosing a Wood Species…
We offer a range of wood species to go standard with our doors. If you would like something other than what we have, in most cases we can source other wood types that are not listed below, though prices will vary.
As you decide which wood you’ll choose please consider these important factors. How the wood species will react to your climate and site condition. Also, how it collaborates with the overall design of the door and your project. If you have specific questions about what wood to choose that are not answered here, feel free to reach out to us.

| Mahogany (Sapele) African Mahogany (Sapele) is a reddish-brown hardwood wood and is desired for its rarity, strength, and beauty. It is one of our most durable, and resists swelling and warping, making it ideal for harsher environments and coastal climates. With its stability and smooth surface, Sapele is also used as our Paint Grade wood selection. | Walnut American Black Walnut hardwood is naturally darker in color, much like an espresso brown. It is strong, hard, and exceptionally durable, without being excessively heavy. When sealed there is a dark contrast from the heartwood and sapwood offering an exotic finish. Although Walnut is naturally dark it has the propensity to lighten over time. |
| White Oak White Oak hardwood has a medium brown grain with an olive cast, while the sapwood ranges from a light cream to tan. Its moisture movement is medium to high and it has a good density with a medium to coarse texture. White Oak is more resistant to weathering issues than Red Oak. | Premium Alder Alder is a light brown with a yellow or reddish tinge. The wood is fairly straight grained with a uniform texture. Alder is a relatively soft hardwood of medium density that has low bending strength, shock resistance, and stiffness. Premium Alder captures the grain beauty without the rustic feel of open knots, will contain some closed knots. |
| Cedar Cedar is a light, reddish-brown softwood. This wood is softer than most hardwoods. Cedar’s fine, straight grain and uniform texture provides a smooth surface ideal for staining, although it requires more maintenance than Mahogany. Cedar remains stable and resists warping, making it a reliable and attractive lighter option. |
Choosing a Door Size…
Because each door we make is sized specifically for the project, you are not restricted to any standard sizes.
Download the Measuring Guide here.
Measurements to Know
When sizing the door you will need to consider two principle measurements, rough opening and frame size. See the image below for reference.

| Rough OpeningThe rough opening is the distance from stud to stud for framing purposes. We advise that you build a rough opening that is ½ in. wider and ½ in. taller than the total door unit. We find that this allows for sufficient shimming and adjustments during installation. | Net Frame Size: Width and HeightThis is the size of the actual door jamb. When determining the net frame size you want to put in a number that is at least a half inch less than the rough opening size to allow room to square and level the door. For example, for a rough opening of 48 in. wide, order a net frame size of 47 1/2 in. |
| Size Guide: While we can make pivot doors of any size, there are a few guidelines to consider when planning your door size. Height: In terms of height minimum, we generally start at 82 in. and go up from there. There is a significant price jump on any door over 12 ft. tall because it requires special engineering. Otherwise, generally speaking, your project requirements will place greater restraint on your height than the pivot door’s engineering. When trying to determine the door height, it is best to go off of what will look best in the space and how much room you have to frame out the door. | Maximum Width: There is a significant price jump on any door over 7 ft. wide because it requires special engineering. Minimum Width: Most customers choose a door that is 48 in. wide. We can build smaller doors but there are several reasons to make 48 in. the minimum. First off, each door must have a minimum pass through of 36 in. Now, add onto this the 1 3/4 in. jamb sides and the amount you want to offset the pivot, and you have to have a door that is at least 42 in. This size, though, will only leave a two inch gap on the pivot side of the door, which does not present a clear statement about the pivoting nature of the door—defeating the purpose of getting a pivot door in the first place in many cases. |
Window and Glass Options…
If you choose a design that incorporates a window into the structure of the door slab itself, you will need to consider window placement and size as well as glass color, thickness, and pattern. Because we work directly with an architectural glass manufacturer, we can provide you with many specifications available in the window industry. While the style of the door generally dictates the number, size, and proportion of windows, you may request to adjust these specifications as well.
Window Placement
If you choose a door style with a window, you have the option to place the window on the handle side or on the pivot side.

Glass Options
Standard Features
All glass we install is 1 in. tempered double-paned insulated glass. Clear and frosted glass patterns are standard pricing options.

Customization
If you are looking for different finish or insulating options, contact us directly and we can provide pricing.You can vary the glass pattern (rain, reflective, glue chip, reeded etc.), glass construction (low e, laminated) or tint (grey, brown tints).


| STEP 2 | DOOR FIT |
| The jamb serves as the frame that the door sits in. Our doors come with a jamb that has been pre- assembled in the shop to make sure that all of the measurements line up. We double and triple check the final measurements our clients give us to make sure that the size of jamb you are expecting is the size that shows up at your worksite. The following points are key to making sure that the door slab and jamb fit into your project design seamlessly: | |
| Jamb Depth Swing Direction | |
| Pivot Placement Threshold |
| Determining Jamb Depth… |
| For the jamb, one of the biggest considerations is jamb depth.Jamb depth depends on the thickness of the walls into which the door unit will be placed. Most walls are studded out with 2×4’s or 2×6’s, and so, our most common jamb depths are 4 5/8 in. and 6 5/8 in., respectively. Usually the jamb is flush with the interior and exterior wall covering, with the seam covered by casing. |
| We have standard jamb depths of 4 5/8 in. 5 1/4 in. 5 1/2 in. 6 5/8 in. 7 1/2 in. |
| If you wish for us to provide a jamb depth different from one of our standard options, please contact us. |
Jamb Depth Dimension

Determining Pivot Placement…
The pivot placement is the distance the pivot pin will be placed away from the vertical edge of the rough opening. Generally speaking, we suggest placing the pivot over one quarter of the distance of the door width. We find that this presents a solid aesthetic for most door dimensions.
If your rough opening is 48” and you choose a 9” pivot placement, the door will roughly have a 37” pass through opening. You want to ensure you leave at least a 36” opening. (Rough opening width – pivot placement measurement – 4 in. for jamb = a number greater than 36). See picture for details or contact us for clarification.

SUGGESTED PIVOT PLACEMENTS
| Door Slab Width | Pivot Placement |
| 42″ – 44″ ……….. | 4″ |
| 45″ – 47″ ……….. | 6″ |
| 48″ – 53″ ……….. | 9″ |
| 54″ – 60″ ……….. | 12″ |
| 61″ – 66″ ……….. | 15″ |
| 67″ – 70″ ……….. | 18″ |
| 71″ – 74″ ……….. | 21″ |
| 75″ – 80″ ……….. | 24″ |
| 81″ – 86″ ……….. | 30″ |
Determining the Door’s Swing…
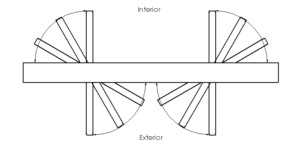
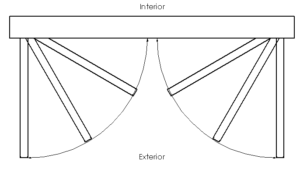
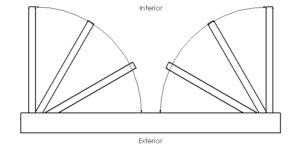
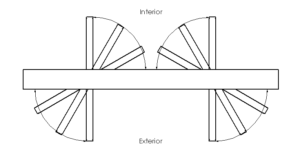
When you order your pivot-hung entryway, you have options when it comes to how the door will swing. Though 99% of the time, you will want a door that swings into the interior (in-swing), we are set up to build jambs where the door swings out to the exterior (pushing your visitors out of the pathway of your tremendous door).
However, when it comes to right-hand or left-hand swing, the layout of your installation site will determine the swing configuration. To determine if the door is left-hand or right-hand in-swing, imagine you are looking at the door from the street. If the pivot point is on the left side, it is a left-hand in-swing. If the pivot point is on the right-hand side, the door is a right-hand in-swing.
Swing Configuration

Choosing a Threshold…
You have a two variables to consider when setting up your threshold, color and type.
Threshold Color
The simplest variable to address is color: “Gray Aluminum” or “Black Anodized Aluminum”.

Threshold Type
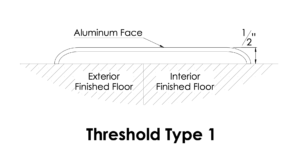
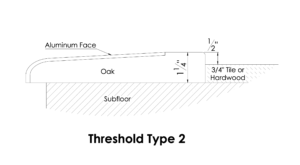
The second variable is what type of threshold works for your project: Type 1 or Type 2.

If there is any type of wood covering on the interior of the house, you will need a Type 2. The Type 2 threshold has a 90 degree angle on the interior facing side for the wood covering to butt up against.
If the exterior floor is the same level as the interior floor, you will need a Type 1 threshold. More commonly, though, the exterior floor is lower than the interior floor and you will need a Type 2 threshold.
| STEP 3 | Sidelight Options | ||
| In many cases, customers wish to purchase sidelights for their door units. We build sidelights and transoms directly into the door unit, so the jamb and sidelights connect seamlessly. All you need to do is tell us what kind of sidelights or transom you want, what size they should be and what kind of glass you want. |
Designing the Sidelights…
| Sidelight Styles… Sidelight styles include: single sidelight double sidelights transom a combination of the above | Glass Options for Sidelights… The same considerations we have for choosing door window glass, as outlined above, apply here. We can get many standard glass options available from industry window manufacturers. | ||
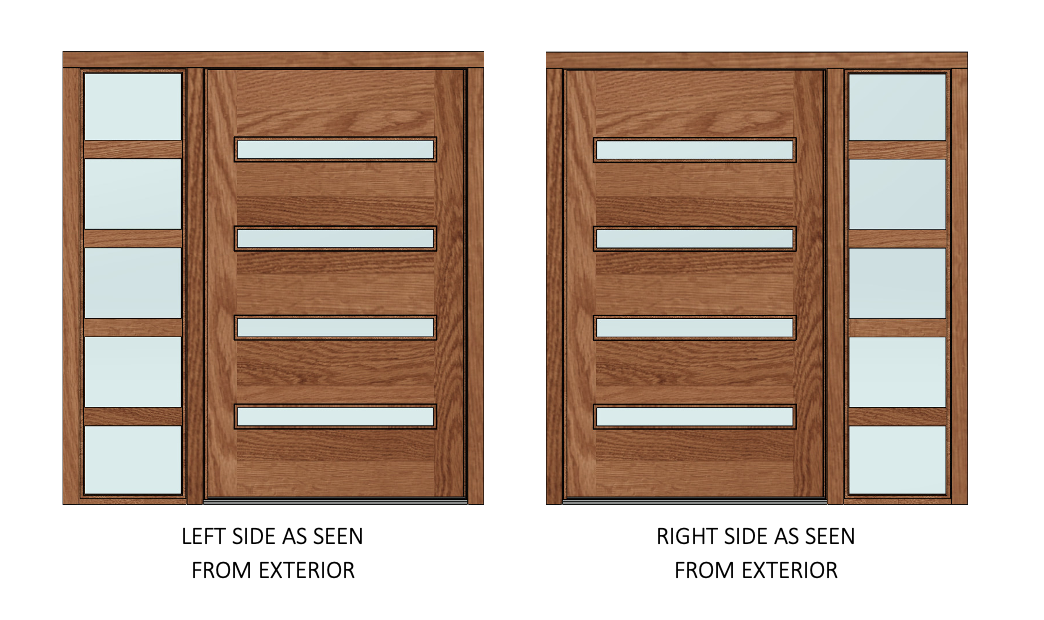
| If you want a customized sidelight style, let us know what you are looking for, and we will let you know if we are set up to build it. We have constructed sidelights with numerous types of frames, panes, and formal elements. | Placement on door… When you order a single sidelight, enter which side of the door you want it to be placed on here, according to an exterior view. The door will be built with the sidelight attached so be sure to input the height of the door and the height of the sidelight the same. Example: 48 in. X 98 in. door with a 18 in. X 98 in.sidelight (on the right), will get you a door and sidelight combo that measures 66 in. X 98 in. |
Determining Single Sidelight Placement

Determining Sidelight Size…
| What to Measure The sidelights and transoms match the doorjamb, either in height or width, so it is easy to determine one dimension. When determining the second dimension, you are most often limited by your overall project’s dimensions. You must consider how you much space you have and how you want the sidelight glass to work with the door in terms of proportion and in terms of how much light they let through. |
Sidelight Net Frame Size
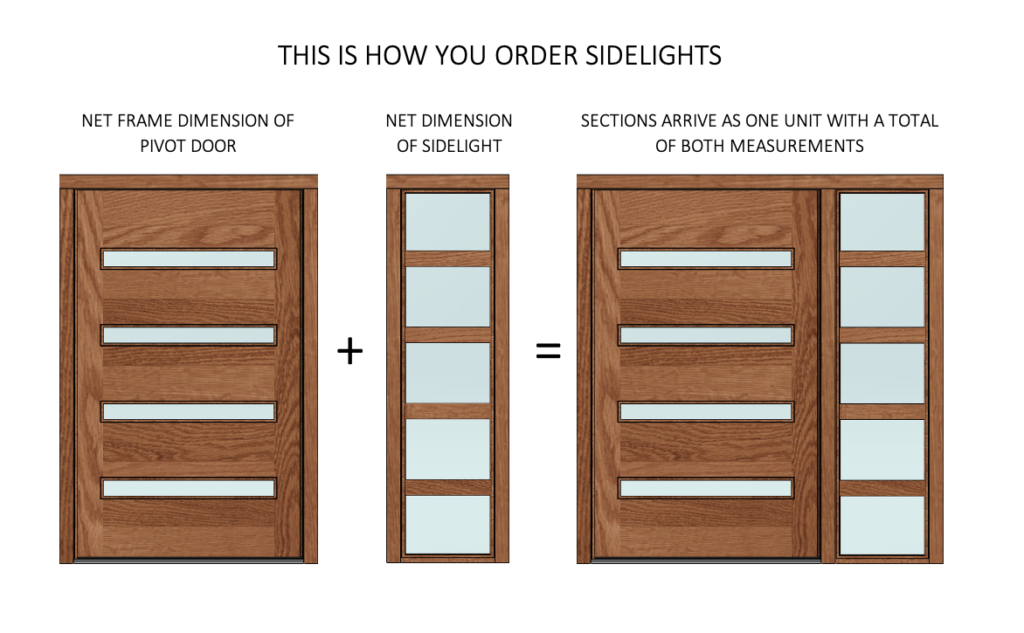
When ordering your sidelight, you will need to input Sidelight Net Frame Width and Height. This measurement includes only the size of the sidelight jamb. See the diagram below for examples of sidelight net frame measurements for a double sidelight. If you need greater clarification regarding sidelight measurements, please contact us directly.
Measurements for Sidelights

Sidelight Building Considerations…
Net Height of Sidelights and Door
The door will be built with the sidelight attached so be sure to input the height of the door and the height of the sidelight the same.
Net Width of Transom and Door
The door will be built with the transom attached so be sure to input the width of the door the same as the width of the transom.
Rought Opening with Sidelights
When inputting the net frame size, you want to put in a number that is at least an inch less than the rough opening size to allow room to square and level the unit.
Example: 48 in. X 98 in. door with a 18 in. X 98 in. sidelight will get you a door and sidelight combo that measures 66 in. X 98 in. (The rough opening size should be at least 66 1/2 in. X 98 1/2 in.)
| STEP 4 | Handle and Closure Options | ||
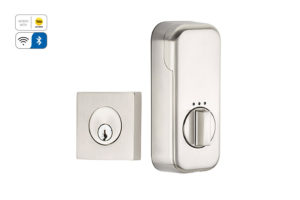
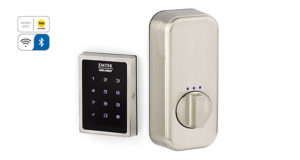
| One last thing to consider when placing your order is handle and closure options. Though the door comes with the pivot hardware installed, other hardware considerations are sold separately. | Related Closure Hardware We provide a number of related hardware products beyond the handle and lockset. | ||
| Handles and Locksets | Magnetic Catches Usually our customers who purchase a pull bar handle also purchase magnetic catches. Magnetic catches will hold the door shut when the deadbolt is not thrown. | ||
| Our Handle Selection First off, you’ll want to decide what kind of handle and lock you want for the door. Though we sell a selection of handles and are able to prep the doors, no handle comes standard with a door. We are able to prep the door for any hardware—either from our selection or from another vendor. In either case, handle prep incurs an additional cost proportional to the task. | Closer In commercial applications and in rare residential applications, we install a bottom closer. The bottom closer creates constant tension on the door’s swing to pull the door into the closed position. This means one must hold the door in order to keep it open. With a closer the door will not rest in an open position unless the hold-open feature is activated, which holds the door open at a 100° angle. | ||
| Handle from Another Vendor If you choose to purchase a handle or lockset from another vendor, you will need to provide us with the specifications for the handle or lockset so we can properly prep. You may then be required to mail us the hardware to properly prep for it. Alternatively, you may decide that you want to wait and have a local carpenter prep the for the door handle. | Heavy Duty Pivot The weight restriction for our standard pivot is 440 pounds and the average weight of our 5ft. X 8 ft. door is 300 pounds. If you choose a door design that is especially heavy due to size or materials, we may need to upgrade to a heavy duty pivot. The upgrade may come at an additional cost. |
Requesting Handle Prep…
| Standard Handle and Deadbolt Preparation We will pre-drill the door for a handle with 2 3/8 in. or 2 3/4 in. backset. Standard bore diameter is 2 1/8 in. The term “backset”refers to the distance from the edge of the door to the center of the bore hole. | Mortise We can mortise the door for many entry lock sets. Please contact us directly to configure your specific requirements. See the diagram below for more details |
Standard Handle Prep….


| STEP 5 | Placing an Order |
Standard Orders
Once you have decided on what you want to order, the next major step is to place the order. You can do this by going online and picking out a door from our site’s shopping portal. Choose the door you want, and then fill out the online order form, providing all of the specification details that match your project. You can immediately see the price and purchase the door.

What’s Included in a Standard Order
The order includes the door slab and a jamb that you will need to re-assemble on site. Once the jamb is together you simply place and secure into the rough opening as with any standard door unit. The pivot hardware is included, already installed in both the door slab and jamb.
Doors ship stain ready, which means the unit needs stain and clear-coat.
Handle sold separately.
Door Slab
The actual door itself, called the door slab, is shipped stain-ready.
Customized Orders
Alternatively, if you wish to speak to someone over the phone about your order, particularly if you wish to customize the door with options that are not available in the online form, you can call or email our sales and design team to discuss what you are looking for.
Once we understand what you are looking for, we’ll send you a bid, usually within 24 hours. You look over the bid, and when you are sure that everything is right, you will place a minimum of 50% deposit to begin the order process. Then we will send you your order and shop drawing to review, finalize and sign to begin production.
We build doors to fit your building project. That means we are flexible when it comes to meeting your project specifications. Whether you pick from our existing line of door styles, or you show us a picture of what you’d like to see made, we make sure the final product stands up to exacting standards—yours and ours.
Door Jamb
Each door shipped comes with a jamb that has been assembled in the shop to ensure that the pivot installation is engineered correctly. The jamb is disassembled for shipping.
Pivot Hardware
Each unit comes with pivot hardware already installed into the door slab and door jamb at precise measurements.
| STEP 6 | Construction and Lead Time | ||
| Construction Period At this point, we take over, ordering the materials, building the door and jamb and getting the door ready for shipping. Feel free to contact us during the construction period to get an update on your door. Once you place the order, the specs you sign off on are the final agreement. Any changes you make after placing the order will increase lead time and potentially incur additional costs. | Lead Times Generally speaking, with our volume and with the time it takes us to receive the materials for the job, the door will be ready to ship to you seven weeks after you place the order. We can offer expedited lead times at an additional cost. Though we are a custom shop, we take pride in our ability to fill orders on time. |
| STEP 7 | Packaging and Shipping |
Engineered Door Crating

Engineered Packaging
Upon completion, each door is wrapped in protective material and then placed in a crate that is custom built for the door dimensions and shipping parameters. We want the door to get there in as beautiful a condition as when it leaves the shop.
Shop to Site Shipping
Every day we ship to cities all over the United States. Pivot Door Company maintains a good relationship with FedEx Freight® Services, the principal shipping company we use in delivering our doors from the shop to your installation site.
Curbside Delivery
Our standard shipment goes out by FedEx Freight® Curbside Delivery. This means a driver will arrive at the delivery site, and will not assist in getting the door off of the truck or moving it up the driveway, it is best if you have 4-5 able-bodied individuals waiting to unload the crate off of the truck, to help balance the crate as the driver lowers the crate with the lift-gate.
Standard Option – 6 Weeks to Ship
Your door leaves the shop six weeks from order confirmation. Allow additional time* for freight delivery. See map below for approximate transit times to your region.

Ship Times from Colorado Springs
Rush Option – 2 weeks less to ship
If six weeks is not soon enough, we can manufacture a custom door sooner if you choose the Rush Option. The additional charge covers reducing production time by 2 weeks including but not limited to; paying the extra hours worked by the production team, paying rush charges for any specialty hardware/materials not in stock. While most door designs are able to be completed in this time frame, some designs may require additional time in production. This rush time frame will be shown on your order before you sign for final order confirmation to begin production. Allow additional time* for freight delivery. In order to cut down on shipping time, your order may be sent FedEx Freight Priority instead of Economy. See map below for approximate transit times to your region.

Ship Times from Colorado Springs
*Pivot Door Company guarantees ship dates; we do not guarantee delivery times. Ship times depend on the carrier. That being said, we have come to trust and see great reliability in Fedex Freight.
| STEP 8 | Finish and Installation | ||
| Finishing the Door Unit All doors leave the shop unfinished. This allows the customer to match finishes more easily. Once you have received your shipped door unit, you will need to give the door immediate attention to make sure that the door stays in good condition. To make your warranty valid, you must stain and clear-coat the door within 72 hours of receipt. Follow the guidelines in our Care and Finishing Guide to take the best care of the wood facing. | Installation Though the instructions included in the product documentation are clear and concise, Pivot Door Company strongly encourages the employment of skilled trades persons to carry out the finishing and installation of each door. These instructions must be completed according to the documentation requirements in order to make valid the manufacturer’s warranty. |

